There’s something undeniably magical about the moment you take your first bite of Tiramisu. As the velvety layers melt in your mouth, you’re transported to a quaint Italian café, perhaps nestled in a sun-drenched piazza. This dessert isn’t just a treat; it’s a celebration of life, love, and the joy of indulging in something sweet. I still remember the first time I tried Tiramisu at a family gathering. My aunt had crafted her own version, and I was smitten. Each bite was a delightful dance of espresso-soaked ladyfingers and rich mascarpone cream, accompanied by the bittersweet notes of cocoa. I knew then I needed to learn this delicious art and pass it on.
## Recipe Timing
- Prep Duration: 30 minutes
- Active Cooking: 10 minutes
- Total Duration: 4 hours (chilling time included)
- Portion Size: Serves about 8
- Complexity: Moderate
## Nutritional Recipe
- Calories per portion: 350 kcal (approx.)
- Protein: 7g
- Carbs: 30g
- Fats: 24g
- Fiber: 0g
- Sugars: 18g
- Sodium: 50mg
## Why You’ll Love This Classic Tiramisu
Tiramisu is the embodiment of Italian culinary elegance. With its creamy mascarpone and espresso-soaked ladyfingers, this dessert can impress the toughest of critics. The balance of coffee and cream acts as a perfect fuel for a conversation starter after a delightful meal. Plus, it’s deceptively simple to prepare! The beauty lies in its layers and the exciting taste that unfolds with every forkful.
## The Complete Cooking Journey
Let’s embark on this delightful culinary adventure together! We’ll start with the richness of egg yolks and sugar, transforming them into a luscious custard. We’ll then fold in the whipped cream, creating that signature light texture that has enchanted dessert lovers worldwide. Finally, we will layer these sweet components, allowing the Tiramisu to rest and develop its flavors. Soon, you’ll be sharing your own Tiramisu memories!
## Ingredients:
- 6 egg yolks
- 3/4 cup granulated sugar
- 2/3 cup milk
- 1 1/4 cups heavy cream
- 8 oz mascarpone cheese
- 1 cup strong brewed coffee, cooled
- 1/4 cup coffee liqueur (optional)
- 24 ladyfingers
- Cocoa powder for dusting
- Dark chocolate shavings for garnish (optional)
## Method:
### Step 1: Create the Egg Mixture
In a saucepan, whisk together egg yolks and sugar over low heat until the mixture thickens. Gradually add the milk, whisking until well combined, and cook for about 5 minutes. Remove from heat and let this luscious mixture cool.
### Step 2: Whip the Cream
In a separate bowl, beat the heavy cream until stiff peaks form. This is a crucial step to ensure your Tiramisu has that airy texture. You’ll want to fold in the mascarpone cheese gently into the cooled egg mixture, followed by the whipped cream. Mix until you achieve a smooth and creamy consistency.
### Step 3: Prepare the Coffee Mixture
Combine the cooled brewed coffee and coffee liqueur in a shallow dish. This mixture is going to infuse your ladyfingers with that unmistakable coffee flavor, so don’t skip this step!
### Step 4: Dip the Ladyfingers
Grab each ladyfinger and dip it briefly into the coffee mixture. Just a quick dip; too long will make them soggy! Arrange half of the dipped ladyfingers in a layer at the bottom of a dish.
### Step 5: Layer with Mascarpone
Spread half of the mascarpone mixture over the first layer of ladyfingers, enjoying the lovely, inviting aroma wafting from the cream.
### Step 6: Repeat the Layering Process
Now, repeat the process with another layer of dipped ladyfingers followed by the remaining mascarpone mixture. Each layer adds depth to your dessert!
### Step 7: Chill and Transform
Cover your dish and let it chill in the refrigerator for at least 4 hours, or preferably overnight. This resting period is crucial as it allows the flavors to meld together beautifully.
### Step 8: Dust and Garnish
Before serving, dust the top generously with cocoa powder. For a touch of elegance, consider adding dark chocolate shavings as garnish. Your Tiramisu is ready to dazzle!
## Serving Suggestions & Pairings
Tiramisu shines best alone, with a good cup of espresso or a sweet dessert wine. For a complete experience, try pairing it with a fresh fruit salad to cut through the richness or serve it alongside homemade biscotti for delightful crunch.
## Storage & Leftovers Guide
Store any leftovers in an airtight container in the refrigerator for up to 2-3 days. Note that Tiramisu can lose some of its texture over time, but it will still be delicious!
## Kitchen Wisdom & Success Tips
- Use Fresh Ingredients: The quality of your mascarpone, coffee, and eggs will significantly influence the final flavor.
- Whip Cream Wisely: Be cautious not to over-whip the cream, which can lead to a grainy texture.
- Layer Gently: When layering, spreading the mascarpone mixture gently helps to maintain the structure of the ladyfingers.
## Flavor Variations & Adaptations
Consider playing with flavors! You could add a splash of vanilla extract to the mascarpone or experiment with flavored liqueurs like amaretto for a unique twist. For a fruitier take, try a berry-infused coffee for soaking the ladyfingers.
## Reader Questions & Solutions
-
What if I don’t have espresso? Can I use instant coffee?
Yes, instant coffee works well! Just dissolve it in hot water for a strong brew. -
Is there a non-alcoholic version?
Absolutely! Simply omit the coffee liqueur and stick to coffee. -
Can I make this a day in advance?
Yes, Tiramisu is perfect for making ahead! It often tastes even better after a night in the fridge. -
What if my custard isn’t thickening?
Make sure you’re whisking over low heat. If it remains thin, continue cooking gently until it thickens to the right consistency. -
How can I add more coffee flavor?
Use a stronger brew or increase the amount of coffee in your soaking mixture.
## Wrapping Up
As you take a bite of your homemade Tiramisu, let the symphony of flavors take you on a delicious journey. This dessert embodies the joys of sharing food, family, and stories. So gather your loved ones, share your creation, and savor each moment together. Happy cooking!
PrintClassic Tiramisu
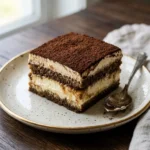
Experience the magic of Tiramisu, a classic Italian dessert made with layers of espresso-soaked ladyfingers and rich mascarpone cream.
- Prep Time: 30 minutes
- Cook Time: 10 minutes
- Total Time: 240 minutes
- Yield: 8 servings 1x
- Category: Dessert
- Method: Chilling
- Cuisine: Italian
- Diet: Vegetarian
Ingredients
- 6 egg yolks
- 3/4 cup granulated sugar
- 2/3 cup milk
- 1 1/4 cups heavy cream
- 8 oz mascarpone cheese
- 1 cup strong brewed coffee, cooled
- 1/4 cup coffee liqueur (optional)
- 24 ladyfingers
- Cocoa powder for dusting
- Dark chocolate shavings for garnish (optional)
Instructions
- Whisk together egg yolks and sugar in a saucepan over low heat until thickened. Gradually add milk and cook for about 5 minutes.
- Beat the heavy cream in a separate bowl until stiff peaks form. Fold in mascarpone cheese gently into the cooled egg mixture.
- Combine the brewed coffee and coffee liqueur in a shallow dish.
- Dip each ladyfinger briefly into the coffee mixture and arrange half in a dish.
- Spread half of the mascarpone mixture over the first layer of ladyfingers.
- Repeat with another layer of dipped ladyfingers followed by remaining mascarpone mixture.
- Cover and chill in the refrigerator for at least 4 hours.
- Dust the top with cocoa powder before serving and garnish with dark chocolate shavings if desired.
Notes
Use fresh ingredients for the best flavor. This dessert can be made a day in advance and tastes even better after resting overnight.
Nutrition
- Serving Size: 1 serving
- Calories: 350
- Sugar: 18g
- Sodium: 50mg
- Fat: 24g
- Saturated Fat: 14g
- Unsaturated Fat: 10g
- Trans Fat: 0g
- Carbohydrates: 30g
- Fiber: 0g
- Protein: 7g
- Cholesterol: 195mg